


Table of contents
- How to Authenticate With JSON Web Token (JWT)
- Introduction
- Prerequisites
- Getting Started
- Creating a Node.js Server
- Updating app.js file:
- Starting server with index.js file
- Creating a User model in user.js file:
- Implementing SignUp and SignIn Controllers
- Importing dependencies in authcontroller.js file :
- Creating SignUp controller in authcontroller.js file:
- Creating SignIn controller in authcontroller.js file:
- Creating a middleware that checks and decode JWT in auth.js file :
- Creating a controller that greets an authenticated user in authcontroller.js file :
- Creating and using Routes
- Testing Endpoints in Postman
- Conclusion
How to Authenticate With JSON Web Token (JWT)
In this article you are going to learn:
• What JSON Web Token (JWT) is.
• How to create JSON Web Token (JWT).
• How to Authenticate and Authorize With JSON Web Token (JWT)
Introduction
JSON Web Token is a standard for creating and sharing encrypted data.
Structure of a JWT :
A JWT contains a Header, Payload and Signature
Header
The first part of a JWT is the Header, It contains the algorithm that will be used to encrypt and token type.
Here is an example of a header:
eyJhbGciOiJIUzI1NiIsInR5cCI6IkpXVCJ9
And here is an example of the header in JSON format:
{
  "alg": "HS256",
  "typ": "JWT"
}
Payload
The second part of JWT is the Payload, It contains the claims which are statements about the user and additional data.
Here is an example of a payload:
eyJzdWIiOiIxMjM0NTY3ODkwIiwibmFtZSI6IkpvaG4gRG9lIiwiaWF0IjoxNTE2MjM5MDIyfQ
And here is an example of the payload in JSON format:
{
  "sub": "1234567890",
  "name": "John Doe",
  "iat": 1516239022
}
Signature
The third or last part of JWT is the signature, It is used to verify the owner of the message and if it wasn't changed along the way, To create the signature the Base64-encoded header, Payload and Secret are taken, then signed along with the algorithm specified in the header.
An example of signature:
SflKxwRJSMeKKF2QT4fwpMeJf36POk6yJV_adQssw5c
And here is how the signature is created:
HMACSHA256(
  base64UrlEncode(header) + "." +
  base64UrlEncode(payload),
 your-256-bit-secret

) secret base64 encoded
Prerequisites
Since we'll be building a Backend Service With Node.js and Express, Knowing All these is an advantage, Though I'll be walking you through it if you don't know them.
• JavaScript
• Express.js
• Some skills in version control
I expect you have Node.js, Any Code Editor, API Testing platform like Postman, MongoDB or any other Database Installed.
Setting up server
Create a file and then name it anything you like I'll name mine fullauth and then initialize the folder with git init command.
Now type code . in your terminal to open the file, this will only work if you are using VsCode.
The next thing we want to do is initialize npm by executing npm init -y in our terminal and we should have our package.json in our folder.
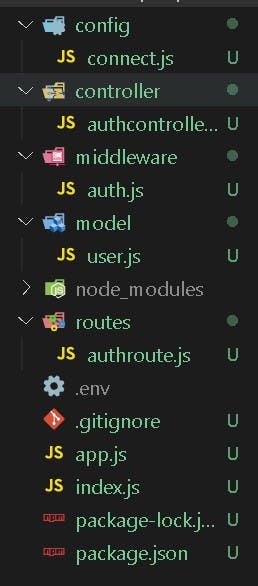
Now we need to create all folders and files we need, we can easily do that with this command:
mkdir config  controller middleware model routes

touch config/connect.js controller/authcontroller.js middleware/auth.js model/user.js routes/authroute.js .gitignore app.js index.js .env
And our folder should look like this :
Installing dependencies
And now we'll be installing all dependencies we need with this command:
npm i mongoose dotenv express jsonwebtoken bcryptjs nodemon
Now we'll add "dev": "nodemon index.js" to scripts in package.json file and "type": "module", the former is for the server to restart automatically and latter is to enable ES6 modules, our package.json file should look like this:
{
  "name": "fullauth",
  "version": "1.0.0",
  "description": "",
  "main": "index.js",
  "scripts": {
    "test": "echo \"Error: no test specified\" && exit 1",
    "dev": "nodemon index.js"
  },
  "keywords": [],
  "author": "",
  "license": "ISC",
  "dependencies": {
    "bcryptjs": "^2.4.3",
    "dotenv": "^16.0.3",
    "express": "^4.18.2",
    "jsonwebtoken": "^8.5.1",
    "mongoose": "^6.7.0",
    "nodemon": "^2.0.20"
  },
  "type": "module"
}
Getting Started
Creating a Node.js Server
Connecting to local MongoDB
We'll add this to connect.js file:
import mongoose from "mongoose";
import "dotenv/config";

const connect = {
    connectToLocalMongoDB : () =>{
        mongoose
          .connect(process.env.MONGO_URI_LOCAL, {
            useNewUrlParser: true,
            useUnifiedTopology: true,
          })
          .then(() => console.log("DB Connected!"))
          .catch((err) => {
            console.log("not able to connect to database"+ err);
          });
    }
}

export default connect;
Adding MONGO_URI_LOCAL to .env file
MONGO_URI_LOCAL=mongodb://127.0.0.1:27017/fullauth
Updating app.js file:
import express from 'express'
import connect from "./config/connect.js";
const app = express()

app.use(
    express.urlencoded({
      extended: false,
    })
  );

app.use(express.json());

connect.connectToLocalMongoDB()

export default app
Starting server with index.js file
We'll add this to our index.js file:
import "dotenv/config";
import app from "./app.js";

const PORT = process.env.PORT || 8080

app.get('/', (req, res) =>{
    res.send("Welcome to Full authentication app")
})

app.listen(PORT, () =>{
    console.log(`app is listening on port ${PORT}`)
})
Adding PORT to .env file
PORT=8080
Now you can run npm run dev to start the server.
Creating a User model in user.js file:
We'll be creating a user model in the user.js file, this is what we'll be calling to perform operations on the database:
import mongoose from "mongoose";

const User = new mongoose.Schema({
    first_name: {type: String, default: null},
    last_name: {type: String, default: null},
    email: {type: String, default: null},
    password: {type: String, default: null},
})

export default mongoose.model("user", User);
Implementing SignUp and SignIn Controllers
We want to implement the signUp controller, the /signup endpoint will be connected to this controller so a new user can register.
What we'll be doing:
- check if user exists
- check if any field is empty
- create a new user and JWT
Importing dependencies in authcontroller.js file :
import "dotenv/config";
import user from "../model/user.js";
import bcrypt from "bcryptjs";
import jwt from "jsonwebtoken";
Creating SignUp controller in authcontroller.js file:
export const signUp = async (req, res) =>{
    const { firstname, lastname, email, password } = req.body

    const oldUser = await user.findOne({email: email})

    if(oldUser){
        return res.status(424).json({
            status: false,
            message: "user already exists"
        })
    }

    if(!(firstname && lastname && email && password)){
        return res.status(424).json({
            status: false,
            message: "all fields are required"
        })
    }

    if( oldUser == null ){
        const encrptedPassword = await bcrypt.hash(password, 12);

        const newUser =  await user.create({
            first_name: firstname,
            last_name: lastname,
            email: email,
            password: encrptedPassword,
        })

        const token = jwt.sign({id: newUser._id, }, process.env.JWT_SECRET_KEY,{expiresIn: "2d"});

        return res.status(200).json({
            status: true,
            message: "Registration successful",
            data: {
                token: token
            }
        })
    }
}
What we did :
We imported all dependencies we'll be using
We Checked if user exists
We Created a new user if they do not exist.
We used Jwt.sign to create a new token, the
.signmethod takes parameters which includes Payload, this contains the claims which are statements about the user and additional data, the second parameter is the secret key we'll use to create a unique hash and then the last parameter I added is the sign option setting the expiry time to 2 days.
Creating SignIn controller in authcontroller.js file:
export const signIn = async (req, res) =>{
    try {
        const { email, password } = req.body;

        const oldUser = await user.findOne({email: email})

        if(!(email && password)){
            return res.status(424).json({
                status: false,
                message: "all fields are required"
            })
        }

        if( oldUser == null ){
            return res.status(424).json({
                status: false,
                message: "User does not exist"
            })
        }

        if( oldUser && (await bcrypt.compare(password, oldUser.password))){
            const token = jwt.sign({id: oldUser._id, email:email }, process.env.JWT_SECRET_KEY,{expiresIn: "2d"});
            return res.status(200).json({
                status: true,
                message: "Login Successful",
                data:{
                    token: token
                }
            })
        }else{
            return res.status(424).json({
                status: false,
                message: "Incorrect email or password"
            })
        }
    } catch (error) {
        return res.status(500).json({
            status: false,
            message: "An error occurred"
        })
    }
}
What we did :
Check if User exist using email address provided
If user exists and password matches the one in the Database, create a JWT with Id and email as payload , the secret in our
.envfile as signature and setting the expiry time to 2 days.Return response that includes the JWT.
Creating a middleware that checks and decode JWT in auth.js file :
import jwt from "jsonwebtoken";

export const verifyToken = async (req, res, next) =>{
    try {
        const token = req.body.token || req.query.token || req.headers['access-token']

        if(!token){
            return res.status(403).json({
                status: false,
                message: `A token is required for authentication`
            })
        }

        const decoded = jwt.verify(token, process.env.JWT_SECRET_KEY)

        req.user = decoded

    } catch (error) {
        return res.status(401).json({
            status: false,
            message: `Invalid Token`
        })
    }
    return next();
}
What we did :
Check for JWT in request Body, Query or Header with ' access-token ' and key.
If JWT is provided decode it with
jwt.verifymethod, this method takes two parameters i.e. the JWT and the secret key that was used to sign it.Assign the decoded object to
req.userso after authentication routes can assess it.Return " Invalid code " if code is expired or tampered with.
Creating a controller that greets an authenticated user in authcontroller.js file :
export const greetUser = async (req, res) =>{
    try {
        const id = req.user.id;

        const oldUser = await user.findById(id);

        if( oldUser ){
            return res.status(200).json({
                status: true,
                message: `Hello ${oldUser.first_name}`
            })
        }else{
            return res.status(498).json({
                status: false,
                message: `Invalid Id`
            })
        }

    } catch (error) {
        return res.status(500).json({
            status: false,
            message: "An error occurred"
        })
    }
}
What we did :
Get the id from
req.userwhen user is authenticatedFind user by id from Database
Return response greeting user with name in Database.
Creating and using Routes
The Next thing we want to do is create endpoints, connect them to controllers in authroute.js file and import them in app.js file so it can be accessible.
Creating and Connecting routes in authroute.js file :
import { Router } from "express";
import { signUp, signIn, greetUser} from "../controller/authcontroller.js";
import { verifyToken } from "../middleware/auth.js";
const router = Router();

router.route("/signup").post(signUp);
router.route("/signIn").post(signIn);
router.route("/greet-user").get(verifyToken, greetUser)

export default router;
Import and use routes in app.js file :
import authroute from "./routes/authroute.js"

app.use(authroute)
Your app.js file should look like this :
import express from 'express'
import connect from "./config/connect.js";
import authroute from "./routes/authroute.js"
const app = express()

app.use(
    express.urlencoded({
      extended: false,
    })
  );

app.use(express.json());

app.use(authroute)

connect.connectToLocalMongoDB()

export default app
Testing Endpoints in Postman
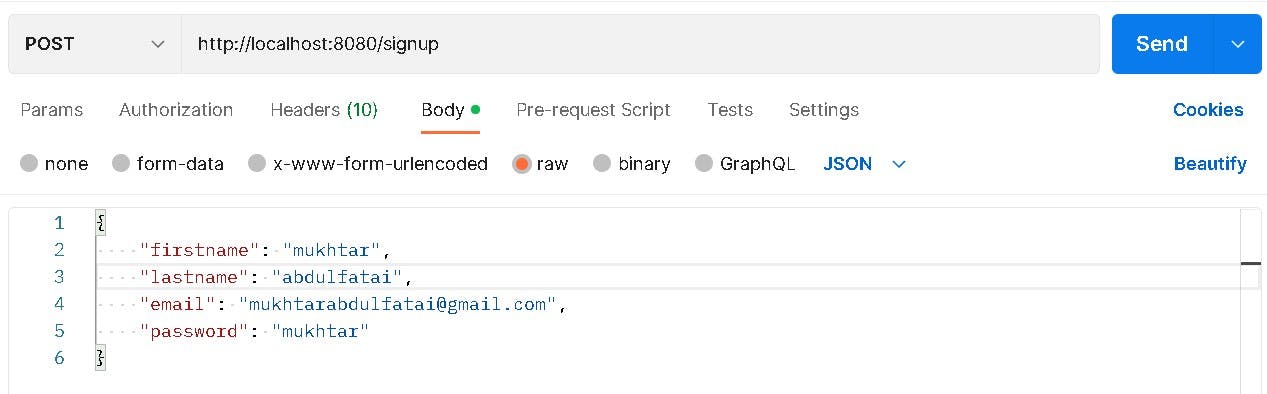
Testing Signup Enpoint
Request :
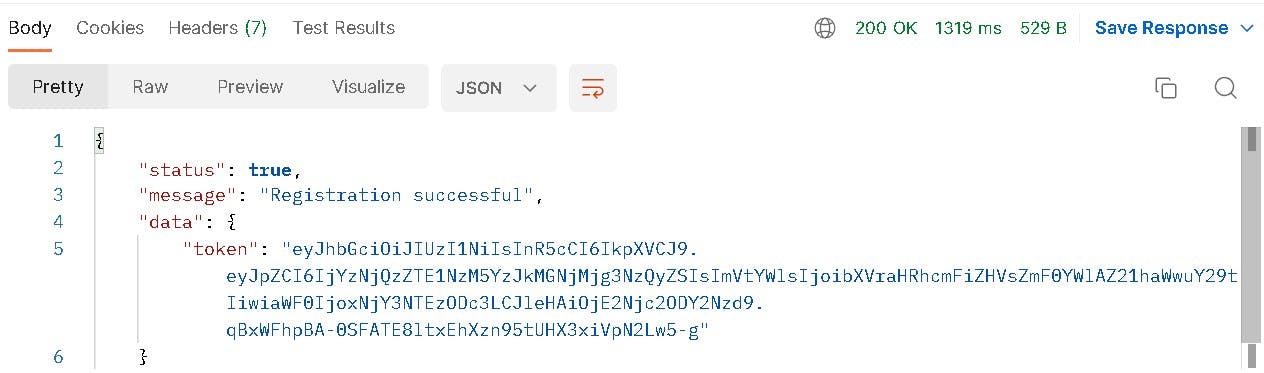
Response :
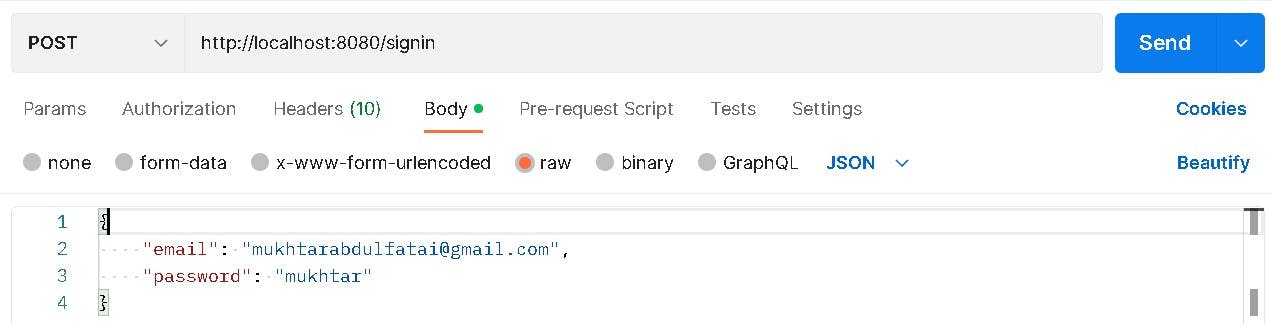
Testing Signin Enpoint
Request :
Response :

Testing greet-user enpoint
Inserting JWT in Header :

Request :

Response :

Conclusion
So we've come this far and I guess you should have learnt how to
- Create a JWT
- Use JWT in signup and signin enpoints
- Extract JWT from header and Decode it
- How to use object from JWT when user passes authentication
“Perfection is achieved not when there is nothing more to add, but rather when there is nothing more to take away.” – Antoine de Saint-Exupery
You can learn more about JWT Here
Thanks for Reading.
You can get the complete code Here
Follow me for more backend development tips.